


Manual welding lines struggle with automation not for lack of competence in the robot but because they lack definition of capability in the welding process. Inadequate weld procedures and highly variable fit-up & placement may be tolerated by human welders, but will rapidly destroy a robot system’s throughput and consumable costs. It’s not about the robot. Fix the welding process first!
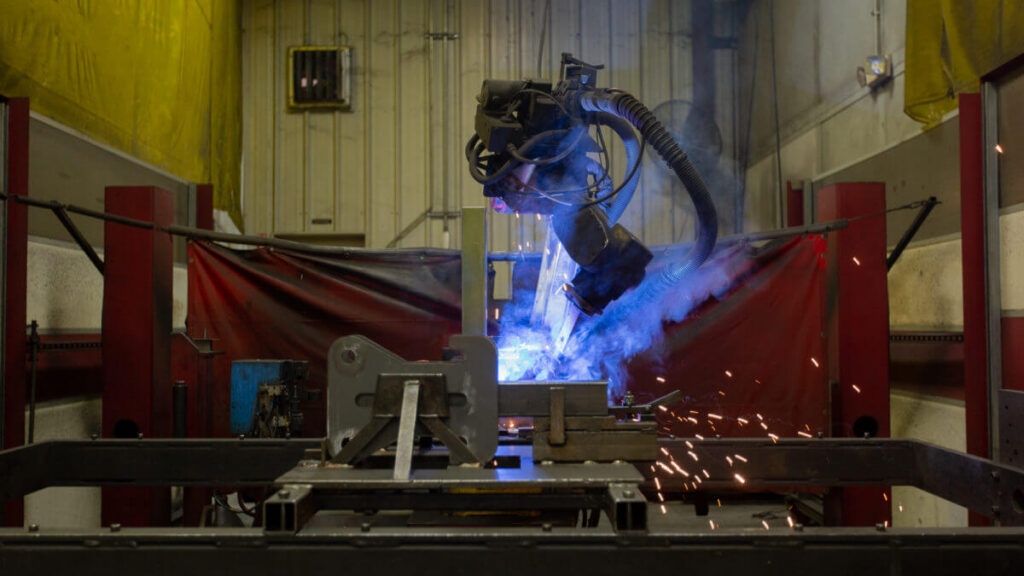
Audit your line before you buy anything.
Before approaching any integrator, evaluate all weld joints on your shop floor based on their volume, repeatability, and level of difficulty. Think about the volume of the weld and how often you do a batch of that weld. Once you have identified high-repetition, high-volume candidate seams, the most appropriate weld process for robot welding will be strongly apparent.
For example, if you mostly work with box tube steel shapes, a reference seam on a flat surface is highly repeatable and a good candidate. A generally low-repeatability seam such as a repair bead probably is not. This will also give you a sense of how to walk before you run.
Choose the right automation tier for your production.
Not every shop will benefit from a six-axis robot cell. The appropriate tier depends on the types of products you handle and how frequently they change.
Dedicated auto-welding machines are suitable for single-product lines where the same joint is welded in high volume with little to no variation – in other words, fixed-path welding on a repetitive part. Six-axis robotic welding cells are a more effective solution for shops that weld batches of different parts since the robot can be reprogrammed between runs and it can work on more complex joint geometries. If you have lower volumes, limited floor space, or an unprepared workforce that you can’t afford to interrupt, then cobots are an attractive option. They operate directly beside workers without the bulky protections surrounding a traditional robot cell, meaning the cost and installation disruptions are lower.
More important than even that, however, is that your actual production pattern should dictate the tier you invest in, not simply opting for the most capable system you can afford. The six-axis cell gathering dust because you alter the product mix weekly is more problematic than the cobot that runs at 70% capacity but never has the opportunity to rest.
Fix fit-up and tolerance before the robot shows up.
Many automation projects fail at the outset. A good manual welder can adapt and make a satisfactory weld when the gap is not perfectly constant but becomes 2mm wider for the last 10mm. The welder simply slows down and perhaps oscillates the torch by a couple of extra millimeters. Slows down too much in a particular place? Maybe they speed up and oscillate a little less to compensate. Adjusting travel speed, weave, or angle may not be acceptable for that 2mm difference on the next part and you get porosity, burn-through, or a cold lap. Preventing this kind of failure is “upstream consistency” and it is the first key to successful automated welding.
Automated welding doesn’t respond to a suddenly faster travel speed. It repeats the program you gave it and that wandering gap creates scrap parts. Automated welding doesn’t know to hesitate when a joint had a little extra flux put on it for one pass. You ran more cleaning amperage to make up for those few parts a little too cold? The next ones with the original parameters installed are going to be a little cold now.
Automated welding doesn’t warn you when the aluminum got swapped out for the new stronger alloy. An automated welding system is only as strong as its weakest station and if you let these upstream stations over which the automated cell has no direct influence vary too much – cutting, pressing, and pre-assembly in this case – the whole system slows down to the rate of manual welding. Then you’ve paid for an expensive piece of equipment that slows output, creates scrap, and requires more time and equipment to keep running than manual welding would have.
Fixturing is the part everyone underestimates.
If you were to ask any integrator what has killed more automated welding launches than anything, I believe most of them would tell you it was not the robot or the welding equipment but the fixturing.
Clamping and indexing tooling holds the part in the exact position the robot expects, every single cycle. A robot has no ability to “see” that a part shifted 3mm in the fixture unless you’ve built in sensing for it, and even then, you’re relying on correction rather than prevention. Fixturing is the unsung precision foundation of the whole project – it’s not glamorous, it doesn’t show up in the sales pitch, and it’s usually the first thing that gets under-budgeted.
Design fixturing around repeatable locating points, not just clamping force. Build in quick-change tooling if you’re running multiple part variants through the same cell. And test the fixture under real production conditions – dirty parts, mill scale, slight dimensional drift from your upstream process – not just with the first clean sample part the supplier hands you.
Select welding machines and controllers that are actually automation-ready.
The power source of the welding machine is just as important as the robot arm – and just as frequently underestimated in cost, complexity and time commitment. Those manual welding machines you use around the shop don’t “just work” with a robot controller, at least not in any kind of productive, predictable fashion.
Finding a welding machine with digital communication interfaces that can be read straight by your robot or PLC, WPS presets loaded on the machine to optimize weld quality and production with minimal programming, and pulse-arc processes for thinner materials and low-dilution, low-distortion joining processes – that’s what turns a lot of eager 6-month timelines into realistic 18-month timelines. Before you commit to a specific system, it’s worth browsing welding machines built specifically with these automation interfaces in mind, since matching the power source to your controller architecture up front saves a lot of rework later.
Build the ROI case with real numbers.
Decisions on whether to proceed with automation projects are primarily based on the return on investment expected, so it’s essential to develop a solid one. You can structure the ROI to cover three areas: reduced rework and scrap, a lower labor cost per weld, and increased throughput due to cycle time reduction.
First, you’ll need to determine your rework rate and scrap costs per unit, which you’re likely already monitoring through your quality program. Next, compare your current labor cost per weld to what it will cost to fully burden the cell including maintenance and consumables. Finally, determine the impact cycle time will have on cost – automated welds are typically run at higher and more consistent travel speeds than a manual weld, and that consistent speed is easier to maintain over the course of multiple hours.
Most shops that crunch these numbers this way end up with an 18 to 24 month ROI target for a correctly chosen joint on a new cell. If your number comes out at four or five years, you’ve either chosen the wrong cell joint to automate or you are underestimating the fixturing and integration cost. If that’s the case, return to the audit and reconsider.
Requalify your welding procedures.
Your existing WPS and PQR documents were designed around manual welding – not surprisingly – and so they don’t exactly fit a robot’s parameters, travel speed, or torch angle. Most quality systems won’t let you skip this step even if you wanted to, since in the end, any given weld is still a manual process; it’s just that the manual bit is done by a programmer who will ideally then forget about it for the next 100,000 units.
Rewrite the procedure specifications around the robot’s actual operating parameters – amperage, voltage, travel speed, torch angle, and heat input – and requalify against the same standards your manual process met. Run non-destructive testing on early production welds. X-ray, ultrasonic testing, and magnetic particle inspection are the usual tools here, and they matter more in this phase than they will once the process is stable, because this is when you catch the gap between what the robot is programmed to do and what it’s actually producing.
Heat input and distortion control is one place automation genuinely outperforms manual welding, since a robot holds parameters far more consistently than human technique ever could. But you still need to prove that with data, not assumption, especially if your customers require documented process qualification.
Phase the rollout so you don’t gamble the whole line.
Do not flip a switch and shut down the manual line the same week the robot arrives. Run a pilot cell alongside your existing manual process for 30 days and compare cycle time, arc-on time, and rework rate side by side.
This gives you real data instead of vendor projections, and it gives your team time to catch integration problems – PLC and weld controller settings that need tuning, fixturing that needs a second revision, seam tracking that needs recalibrating for a specific part variant – while the manual line is still covering production. Only scale to additional cells or shifts once the pilot data actually supports it.
This is also where Industry 4.0 and IIoT data capture starts paying off. Weld controllers logging every parameter on every weld give you a dataset for continuous improvement that manual welding never produced. Use that first pilot month to establish your baseline, then keep monitoring after you scale.
Plan the workforce transition early, not last.
The labor argument for automation isn’t hypothetical. The American Welding Society projects a shortage of 330,000 welders in the U.S. by 2028, and that gap is already showing up on shop floors as open reqs that don’t get filled. Automation isn’t replacing a workforce that exists – it’s covering a gap that’s already there.
That doesn’t mean your experienced welders become redundant. Retrain them as robot operators and programmers. They already understand puddle behavior, arc characteristics, and what a good weld looks like, and that knowledge is exactly what catches wire-feed problems or torch-alignment drift before it turns into scrap. A manual welder with six months of robot programming training is a far better first hire for your cell than an outside robotics technician with no welding background.
Start this training during the pilot phase, not after you’ve scaled. Your best operators will be the ones who spot problems in the data logs because they know what the arc should sound and look like, even watching it through a camera feed instead of a helmet.
Automation doesn’t remove the need for welding skill on your floor. It just moves that skill from the torch to the controller, and the shops that plan for that shift end up with a smoother transition and a workforce that actually wants to stick around for it.
